This will be a double post! First I will "make" the accessory and then I will make the accessory for the accessory.
I´ve
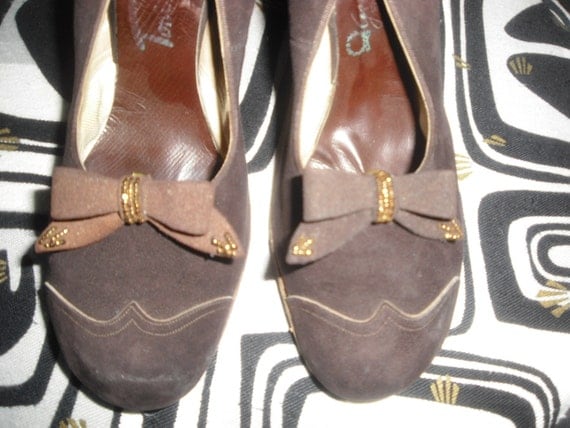
had this pair of before beautiful now dirty and scuffed 1940's pumps
for a couple of years now. They were bought from a theaters flea market.
That explains the topsy-turvy shape of them. In many cases the outer
soles of vintage shoes are worn, but the shoes themself have lasted time
great. These though are scuffy, dirty and have a sad appearance, but
the outer soles are in perfect condition. Either they have only been
used on the stage or the soles have been replaced. The greyish color is
unusual and kind of pretty. I really have tried to make an excuse to
wear them, but somehow they have stayed hidden in the back of my
wardrobe.
Then an idea came to me! I decided to paint them to hide the imperfrctions and smudges. I sometimes feel a bit bad, when I see authentic vintage pieces severely shortened or changed some other way. But in this case the changes I decided to make were similar to the ones people could have made in the era the shoes belong to.
I bought a paint called Liquitex professional acrylic ink (more info of the product here). The color is burnt sienna. I got the ink from a store that sells arts and crafts supplies. The shop keeper recommended to use the ink instead of paint as it sticks better to leather and is thin enough not to crack. To spread the paint I used a bigger brush with a flat end. The little details such as seams and edges I painted with a smaller brush. Whilst painting I noticed that the ink was really light and transparent so I painted a layer after layer after layer until I had lost the count.
The other shoe after the first layer:
Both shoes after about six layers:
Painting finally finished! I still need to go through the inside lining and rubber parts with a cotton stick and nail polish remover to tidy the spillovers.
(I must admit I almost lost all of my patience, nerves and hope with this project. Especially when I spilled half of the ink bottles content on to our balcony carpet..)
As I was waiting for the ink to dry I was (once again) browsing through Etsy and Ebay and I got inspired by some bow shaped shoe clips. Here´s something I found:
(sold here)
(sold here)
(sold here)
I wanted to make a pair for the newly painted shoes. Earlier this year I had bought a pile of dress clip findings (from this seller) which suited fine to my puposes. The dress clips though have some sharp spikes on them that I flattened with pliers. They would propably have torn the leather of the shoes.
Suprisingly I wanted to work with felt. I picked out burgundy and brown (although later on I did not use the brown one) colored felts and some copper colored seed beads.
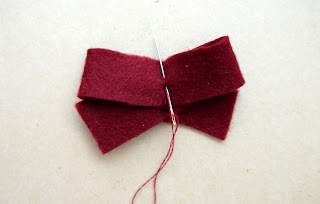
First I cut out the proper pieces to make a bow. You will need a bigger piece that is about 23cm/9.1" x 2,5cm/1" and a smaller one that measures 5cm/2" x 1,5cm/0.6".
Turn the ends of the bigger piece under and stich.
Next take the smaller piece and wrap it around the bigger one. Cover the stiching you´ve just made. Leave the seam to the backside. Then stich the ends of the smaller piece together.
And voilá! You have a bow!

It´s time for the beads! I emroideried the center and made a little detailing. The possibilities are endless!
The last step is to add the clip. You can use glue or stiching. If you want to use proper shoe clips parts you can find them for example here.
And then there´s nothing else left to do than to go out and let the world see your "new" shoes!


